MGA! Tech Talk – March/April 2017

 This month’s topic is prompted by the numerous cars that come into my shop with a common problem…. a crushed rear brake line. Usually this isn’t why their car is brought in, but rather a byproduct of HOW it is brought in.
Brake fluid in our MGAs and Magnettes travels via steel pipes (and flexible rubber hoses) to each of the front brakes and to the rear axle. At the rear, the line divides on the axle and fluid follows steel pipes to each rear wheel cylinder. These rear axle pipes are somewhat hidden as they hug closely to the leading edge of the axle as they travel to each side. When, on the rare occasion our cars need to be towed in for service, tow truck drivers inadvertently crush one or both rear axle brake pipes by incorrectly strapping down our car. If left unnoticed, the rear brake(s) may not function due to the blocked line. Or even worse, the rear brake(s) may apply properly under the pressure of your foot, but not release because of a partial blockage, causing brake drag, heat build-up, and possible catastrophic failure!
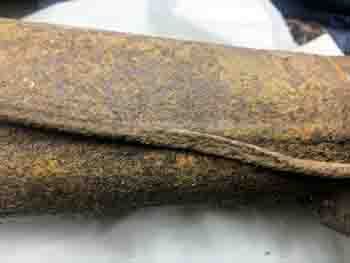
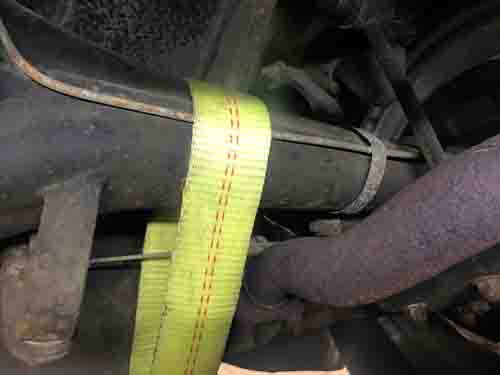
A direct replacement for the damaged brake line is usually available from our regular MG suppliers. A universal brake line of similar length may be found at your local parts store. Be sure to take your original to match the type of flare at each end of the pipe. It may be a bubble flare or an inverted double flare. Also, the threaded fitting is critical. Most MGAs were fitted with a 3/8-24-UNF thread. Very early MGAs and Magnettes could have been fitted with 3/8-BSF. Another option, provided the fittings are in good shape, is to make a custom line, transfer the original fittings, and make the proper flare at each end using a flaring tool. Modern brake tubing is designed to be easily bent into position. Bleed the brakes, check for leaks, and you should be good to go. If the line had been damaged for a long time, be sure to ensure the accompanying wheel cylinder or caliper has not frozen up due to lack of use.
To prevent this type of damage from occurring again, be it from a tow truck or your personal trailer, let’s look at how to properly tie-down the MGA for transport.
It is widely agreed the best way to secure an MG would be to anchor it with wheel straps. These are fitted around each tire, resulting in a secure car, without overstressing any part of the chassis. Many towing companies use these, and I highly recommend asking for the use of wheel straps when transporting your car. For personal use, wheel straps may not be an option to use on many trailers. For most of the trailering population, we use high quality straps with a spring-lock clasp on the hooks. This simple clasp is a very worthy safety feature over lower quality straps without. Just recently I heard of a NAMGAR member who almost lost an MGA Deluxe as the result of a strap loosening a bit once the car settled, and the open hooks allowed the straps to simply fall away, allowing the car to roll off the moving trailer! Thanks to the owner’s quick reactions, he saved the car…and other nearby motorists.
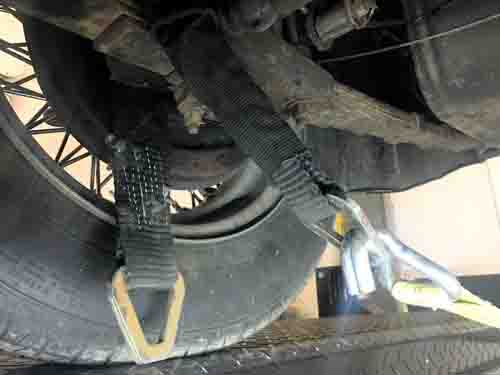
Another debate is exactly how and where to attach the tie-down straps. Some wrap around the rear leaf spring at the rear shackle.
On the front, they insert the hook into the holes on the underside of the front cross member. These may work okay, but I propose a better and safer option, especially since the straps could easily fall out of the front cross member if they got slack Rather, the following techniques yield very reliable results.
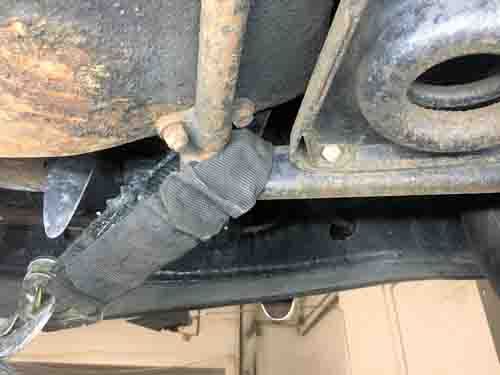
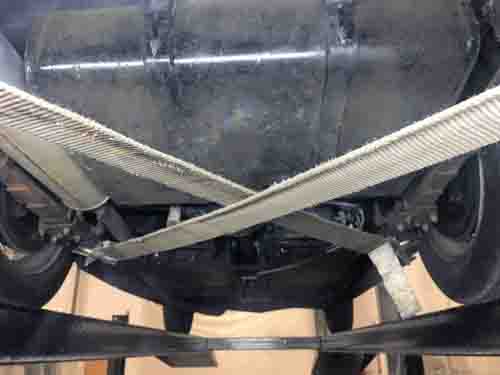
On the rear, a strap around the leaf spring, just in front of the axle tube works well. This will allow the straps to lie flat and low, anchoring the unsprung rear suspension directly to the trailer. It also allows for the body to use its natural suspension to absorb bumps, rather than be limited by the tie-downs.
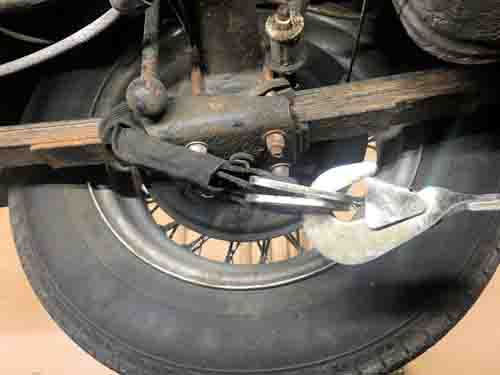
Moss Motors offers a unique accessory for the MGB, which easily installs on the rear axle U-bolts. These tie-down plates allow for easy attachment of a strap at a very good location. Unfortunately, they do not fit the MGA or Magnette, which has a slightly different U-bolt pattern. These can be adapted to fit the MGA, but two of the U-bolt holes, and probably the center hole, will need to be modified. Possibly one of NAMGAR’s entrepreneurs might develop these specifically for the MGA and Magnette in the future!
Continuing with the discussion of the rear straps, you are highly encouraged to arrange them in an “X” pattern, rather than right strap and left strap. This brings additional security as the car will not be able to shift from side to side.
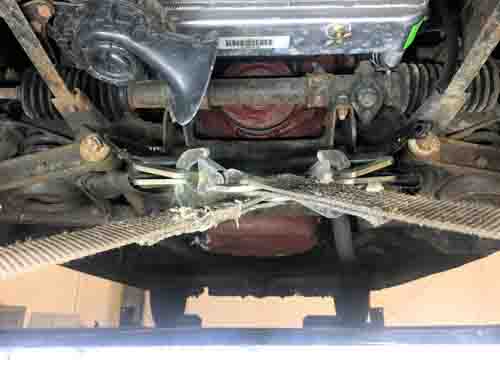
On the front of the car, I have found it best to drop 12” loop straps through the gap in the inner side of each lower control arm. This seems to provide a good balance of planting the front suspension without placing undue stress on any of the steering components. Again, I encourage the front straps to be in an “X” pattern to provide maximum stability.
Driving our MGs are what most NAMGAR members prefer, but there are many reasons why we occasionally transport them. Whatever it takes to get your car out of the garage, I applaud. Just please take the proper towing precautions so that you don’t see your prized possession passing you by!
Safety fast!

