
MGA! Tech Talk – May/June 2018

 One of the seemingly simple jobs on an MGA is installation of the front bumper. There are only four large nuts that hold it to the car.
But ask anyone who has attempted this task and they will begin to groan about what a difficult job it really is. Even if all goes well, the process can take hours to complete. The top edge of the bumper is very difficult to line up evenly with the lower edge of the front fenders and main body section. As there are no visible means of adjustment, the job becomes frustrating, and many a front bumper is left fitting poorly.
Of course, the best time to address fitment issues is during the restoration process, prior to final paint. But if your car is already painted and you just wish to replace or improve the look of your existing bumper, here are a few tips for achieving good results. Some items you may wish to have on hand for the job are:
- Penetrating oil (use in advance on any bolts you may be working with)
- 1/2” x 20 tap and die to clean the threads on the mounting studs and nuts
- Masking tape (suitable for painted surfaces) to run along near by edges to prevent scratching
- Four replacement rubber bumper bracket grommets
- Various thickness 1/2” I.D. washers for spacing bumper, as needed
- Valance hardware kit (in case your 10-32 retaining bolts are of the wrong type or are rusty)
- Touch-up paint
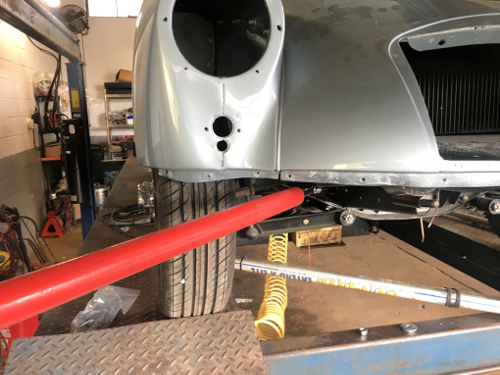
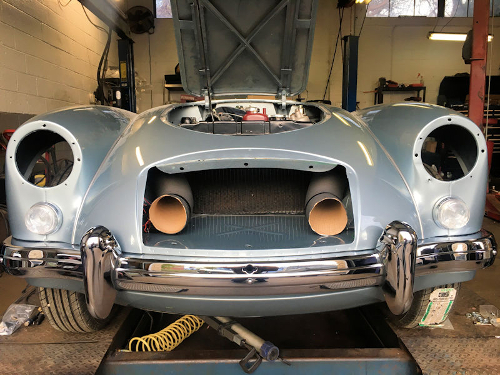
Begin by assessing the fit of your bumper. Standing in front of the car, it should just tuck up under the overhang of the front bodywork. The gap should be relatively even from the left to the right side of the car. Look closely to see that the rearmost edge of the top of the bumper is near, but not touching any of the bodywork (see photos below). The bumper should not be leaning back or forward, and the tips should have the same clearance from the valance on each end. The front valance bolts should be mostly hidden by the bumper. If they are greatly exposed, the bumper is too low or too far forward … or both.


Once you determine what direction you need to move the bumper, run a protective strip of automotive masking tape between the bumper and any adjacent painted surfaces to help prevent scratching.
Apply penetrating oil to all of the threads on the backside of the bumper, being careful not to let any excess stain the painted surfaces. Loosen all bumper and overrider bolts to allow the bumper to flex as much as possible while still mounted to the car. If it’s just a very minor adjustment, a floor jack and a strategically placed block of wood covered by a soft cloth can be used to carefully jack the trouble spot up.
Be careful not to come in contact with any painted surfaces and expect it to spring back a fair amount as you release the jack. Once positioned where you are happy, simply tighten all the bolts and, if lucky, you’re all done! But for most of us, more dramatic changes are usually required, in which the bumper assembly and valance should be removed.
Using a 3/4″ wrench, remove the center two nuts retaining the bumper bracket to the frame extension. This can be slow going, especially if the threads are rusty. Next remove the outer two nuts retaining the bumper bracket to the outer frame extension brackets. As you loosen the nuts, be careful the bumper doesn’t shift and scratch the paint.
To better facilitate removing the bumper and valance, it is helpful to loosen or remove the left and right bumper brackets from the frame extension (located behind the valance).
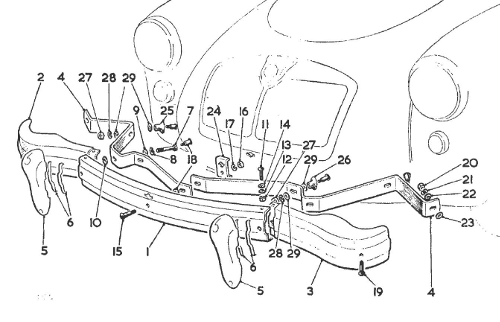
Once the bumper assembly is removed, carefully examine the flat spring-steel brackets on the back of the bumper. They should be symmetrical, without any twist. Straightening an old one can be very difficult and is best done by clamping it in a vise once the bumper is disassembled. Avoid using heat, as improper cooling will alter the spring rate of the metal. If beyond repair, replacements are available.
Next, remove the four rubber grommets from the extension mounts that protrude through the valance and remove the valance. If you had removed or loosened the left and right brackets, reinstall and tighten. Examine the brackets for symmetry with the car more than with themselves. Most cars have experienced some sort of impact on the front end in their lives, and as a result, the repaired bodywork may not be to original specifications. If the front frame extension is severely bent, then it may need to be straightened prior to improving the fit of the bumper. But remember, for this exercise, you are conforming the parts to fit your car, rather than to exact factory measurements.
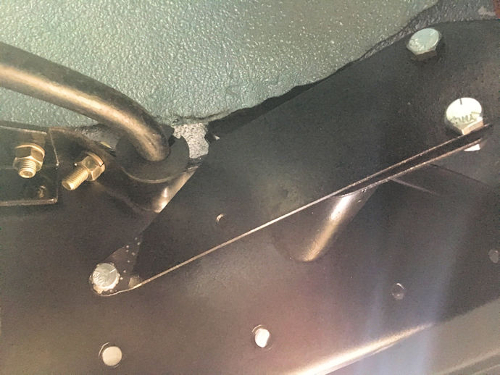
In most cases, your car will just need adjustment of the mounting studs. Thread the ó” bumper nuts all the way back onto any of the extensions that you plan to manipulate. Obtain a suitable bar of 1” inside diameter or more, so as to apply leverage to the stud. I use the handle from a floor jack to accomplish this task.
As you apply force to the stud, you will feel it move in the direction you want. Baby steps are encouraged here! Make a minor change and reinstall the bumper without the valance. Repeat as many times as it takes to get the bumper fitting nicely. Also, pay attention to forward spacing and adjust using various combinations of the large ó” I.D. washers.
When you are feeling confident that the bumper is fitting well, reinstall the valance, paying careful attention to be sure the holes still align with the new position of the mounting studs. If not, minor filing on the valance will be required. Be sure to touch-up any raw metal edges after filing. This is also a good opportunity to touch-up the underside of the bodywork where the bumper tucks under. If this surface is rusty or chipped, it will reflect in your shiny new bumper and look bad.

Originally there were two different part numbers for the rubber grommets, but now one size is sold for all.
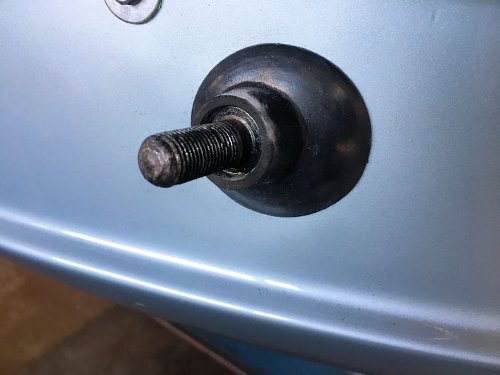
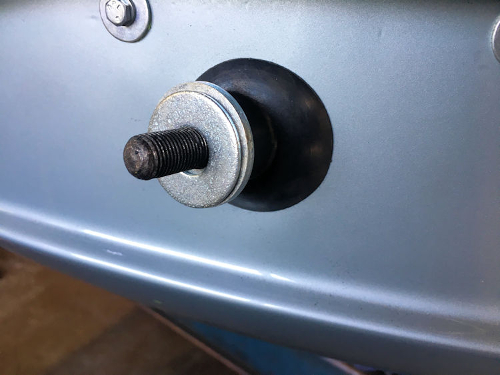
To greatly improve the fit, slide each grommet up on the stud and observe how much rubber overhangs the shoulder of the stud and onto the threads. Subtract an 1/8” for some compression when assembled, and simply cut the excess rubber off. Fit the four modified rubber grommets over the mounting studs. Install the washers, bumper, and tighten any loose bolts on the bumper assembly and brackets.
With a lot of patience, the bumper can be made to fit quite nicely. And it will greatly enhance your pride when people ask, “How did you get your bumper to fit so well?” Just don’t groan too loudly when you respond. See you on the road!